

This paper rosette wreath was my gift for my partner in the Holiday Gift Exchange from Craftaholics Anonymous. It was fun to make and give! My partner was Carey from Utah, here is her Blog!

To make the rosettes, I cut two strips of paper about 1.5-2" wide by 12" or 8", depending on the paper I was using. Then, I scored lines every 0.5" so they could easily be folded.

Once the paper was folded, I used a tape gun to connect the two strips of paper into one continuous ring, making sure to overlap the folds on the ends.


This is what the ring looks like once the two strips are glued together.

With the pattern I wanted to show face down, I bent one side toward the center to make the ring into a rosette.

They are pretty springy due to all of the folds, so I had to use a hot glue gun to hold the rosette in place.

I placed a small piece of scrap paper over the hot glue to hold everything together.

Here are the completed rosettes ready to be glued to the wreath!

I found this ring in the floral section of Michaels which I used as the wreath base. There were already holes drilled through it, so I tied a ribbon through one of the holes for a hanger before covering it with the rosettes.

Fray-Check glue helps keep the ends of the ribbon from fraying.

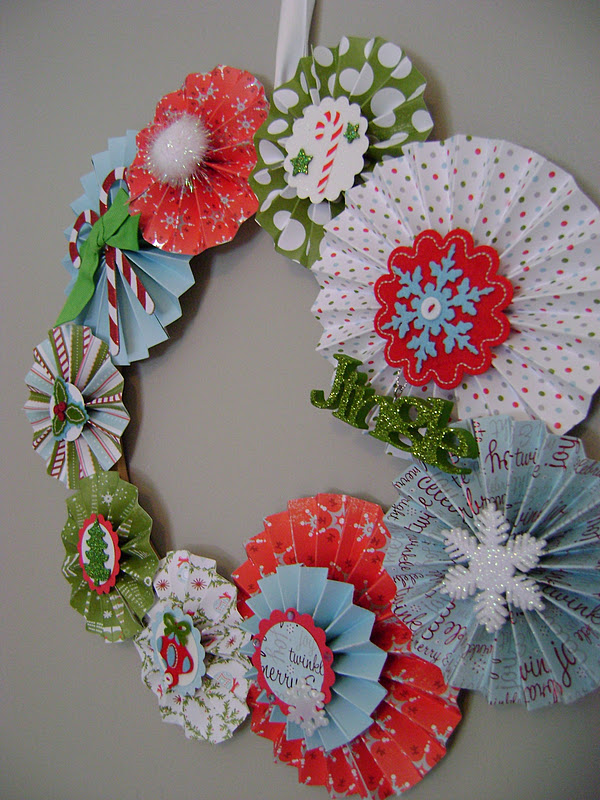
I used hot glue again to secure the rosettes to the wreath base. Not complete without some sparkle and embellishments!
Here is the finished product:
Here is the finished product:

This was so much fun to make, I made two more like this for my mom and mother-in-law. I'm giving them to them at Thanksgiving so they can hang them throughout December!


Your wreath is beautiful. I'm sure Cary will love it!
ReplyDeleteHappy Holidays!
Angela