Pages

How to Decorate for Halloween

Sunday, October 11, 2015

I LOVE Halloween, partly because it is such a fun holiday to decorate the house for. Our entire living room transforms, to the point that it echos when we take the decorations down!  Decorating for Halloween is great beacuse it's easy to create a large impact using just a few inexpensive items.

Fake spider web is a must for creating a lot with a little during Halloween.  I put it over our entire brick wall, but also look to add it to existing items in my living room including vases and candle holders.

I don't like a lot of little Halloween nick-knacks around, since they take-up a lot of storage space and start to look cluttered to me after a while. I do add a few accents here and there for Halloween guests to 'discover'. To me, a single skull left behind somewhere has more impact than a row of halloween figurines on a shelf.

Fake spiders are great to toss in unexpected places including the inside of lamp shades and on chargers and other flat surfaces.

My favorite item to use is this Halloween cloth that I get from the dollar store. I drape it over everything: serving stands, stair railings, candle holders, chandeliers, and I'll even take down our artwork and drape it on the nails to create a spooky wall.

There are a ton of great Halloween images to print out yourself and add to existing frames.  I even take them over the glass rather than taking the time to open up the frames.  The best part is that they take up almost no space to store!

Also, look for fun ways to make ordinary and cheesy halloween items fresh and exciting, like these window clings strategically placed under a slanting blind or a skeleton that looks up at you from under the sofa.


Halloween Chili Bar

Sunday, October 4, 2015


Last year we chose a 'Creepy Chili Bar' theme for our annual Spooky Dinner which was a huge hit! Not only does chili make the perfect fall food, but it's easy to make and can be made in advance so entertaining is easy.

We served two chili's, a classic red chili with beef and a creamy white chili with chicken.  To spook them up I made description cards changing all of the ingredients to their creepy look a likes:


I served the chili with cornbread skulls using the skull pan I purchased to make Zombie Head Meatloaves
'Breadstick Bones' are made by taking a can of refrigerated breadsticks, tying a knot in the end of each breadstick and baking as directed

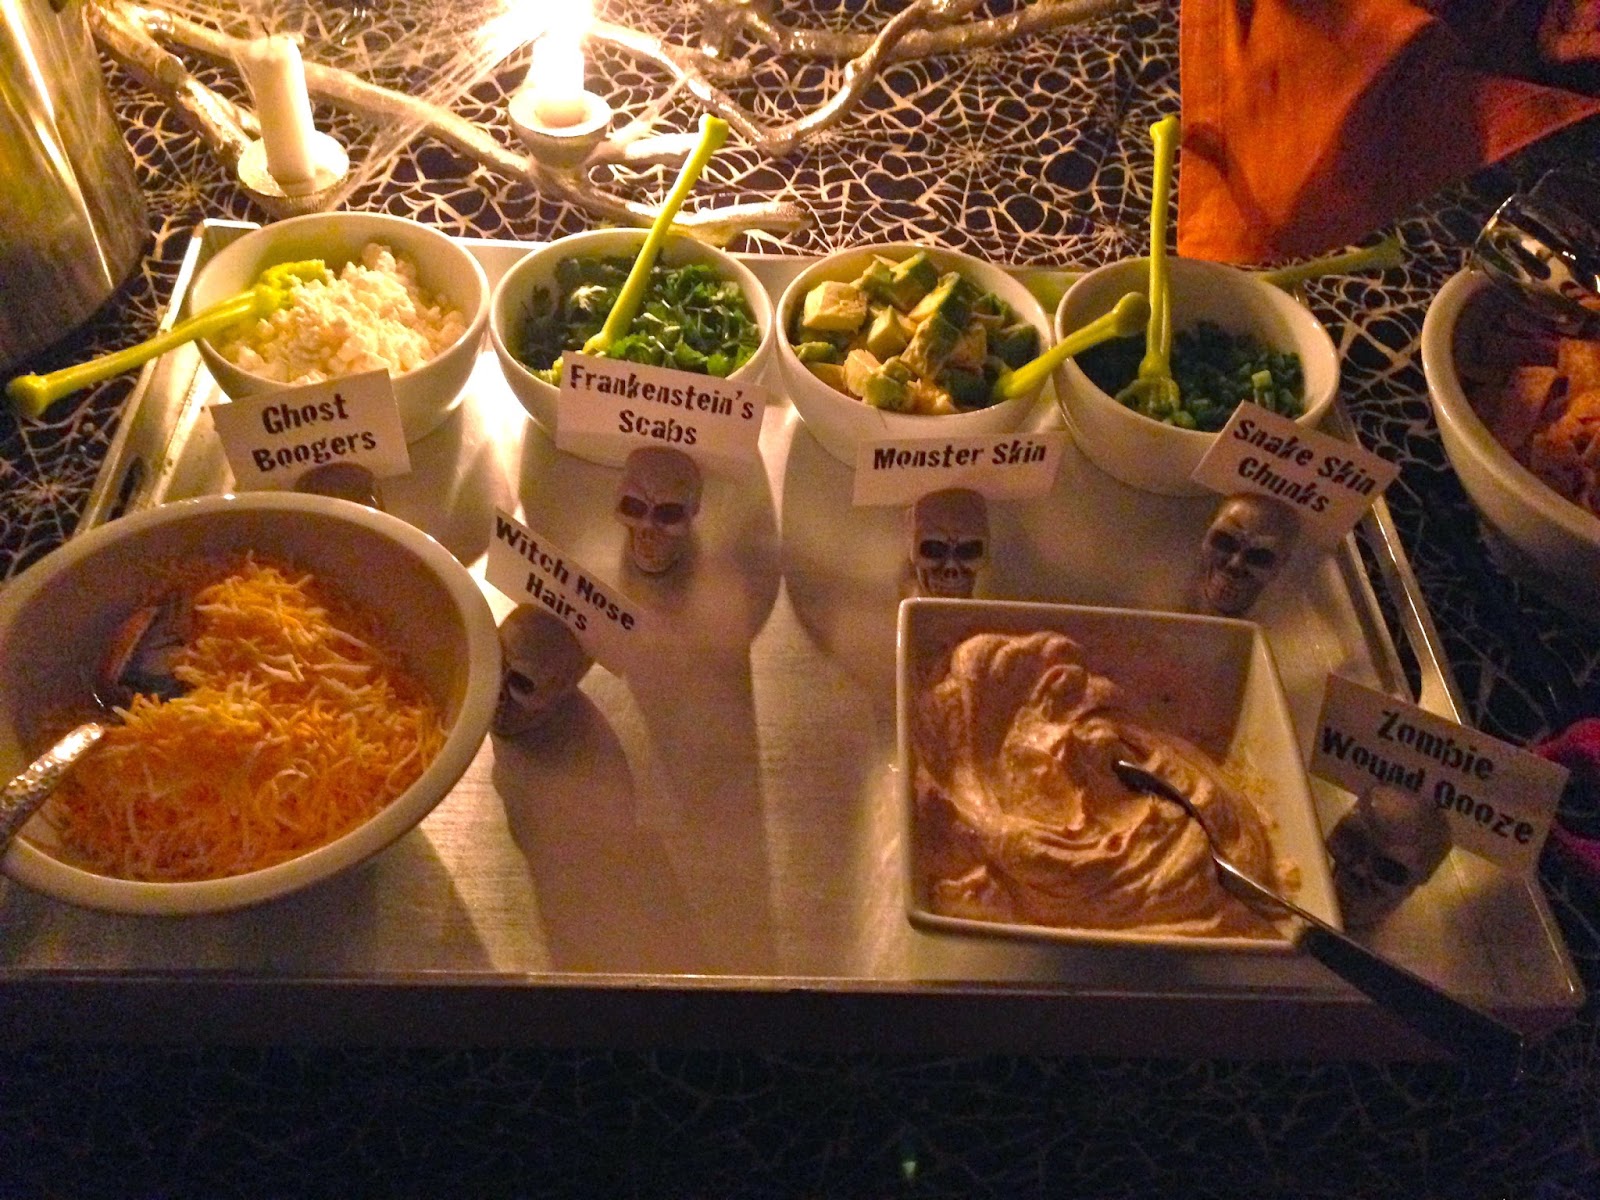
The toppings for the chili also had fun names bringing them from ordinary to spooky.
Fritos and Sante Fe Salad topper chips were 'Mummy Toe Nails' and 'Witch Finger Nails'.

I tried to include every possible topping for the chili and give them a fun name, while touching on all of the classic Halloween characters. Below is the list of toppings with their Halloween name:

Snake Skin Chunks
(Green Onions)

Witch Nose Hairs
(Cheddar Cheese)

Ghost Boogers
(Feta Cheese)

Zombie Wound Oooze
(Seasoned Sour Cream)

Witch Fingernails
(Tortilla Strips)

Mummy Toe Nails
(Fritos)

Frankenstein’s Scabs
(Cilantro)

Monster Skin
(Avocado)

Click Here to view Spooky Dinners from previous years.

Halloween Dinner Party Invitation

Sunday, September 27, 2015

I always think that the invitation sets the tone for a party, and since Halloween parties are usually all-out it's hard to find an invitation that will do the party justice! Here are the invitations I made for our Spooky Dinner last year.  They are actually simple and easy to make, but some minor added details help make them a bit more spooky!
 I typed out the text and added some Halloween clip-art from Google Images, then printed on cardstock. 

I like to put googly eyes on everything I can (they just make everything more fun--especially our Roomba!).  Here googly eyes replace the 'O's in Spooky


The printed skeleton is holding an actual wine glass (well, an actual sticker from Jolee's)

The spider is 3-D, not printed. I cut them out using a punch.


To add a bit more spook factor, I made a sleeve for the invitation using bandages from Walgreens.

A giant spider sticker sealed the bandage around the invite, and I added a few more smaller punch-out spiders.

Here's what the final invitation looked like prior to sending!

DIY Dress-Up Kit Gift

Sunday, September 20, 2015

 If there is someone in your life who would love some dress-up clothes, now is the best time of year to buy them! Last year around this time I stocked-up on dress-up clothes for my niece Lyla.  I thought it would be a fun Christmas gift that would inspire creativity and that she would get a lot of use from.

My original plan was to get a lot of Halloween costumes on clearance, but they were SO cheaply made that they weren't even worth buying new! Instead, I found a lot of really, really nice dance outfits at Goodwill.  They tend to hang onto these donations and only set them out prior to Halloween, so go get them now!  Here are a few that I found:
During the Halloween season you can also find a lot of jewelry, crowns, and wands in dollar bins that made great additions to my gift.  

I purchased a purple storage bin from Target to store it all, and used my Cuttlebug to add the words 'Dress-Up' and my Niece's name to the outside.  I would have loved a box of fun like this when I was little! 

Wine Cork Rug

Sunday, September 13, 2015

 Thanks to the admin ladies at my husband's office, I had piles of corks in my craft closet that kept reminding me I was overdue for a wine cork craft.  

Since I've have already made ornaments and decorative letters out of corks, I was searching for something new to make.  When I came across the idea for a cork rug I thought it would be perfect to put by our patio door.  Since the door is in our living/dining room most rugs look out of place, but we still needed something to hold a pair of shoes for quick access to the deck.

The rug base started as the Nackten rug from Ikea, which I think is $2.

Before I started I painted the edge of the rug dark brown to match our floors incase the edges would show. Then I began hours of hot gluing 200+ corks to the rug.  (This is a two-movie project).

After the rows of corks were glued I went pack and painted the additional white space.

In hindsight, I would have used a rectangular rug with straight edges as it got awkward trying to make the rounded border out of corks.

The finished rug is definitely unique!

Here's how it looks placed by our patio door.

Minnesota Themed Beer Tasting

Saturday, September 5, 2015


We had so much fun at last year's beer tasting that we decided to make it an annual event! Since our family was visiting for the Minnesota State Fair, we decided to make the tasting MN themed featuring classic and new MN based beers!

I found some vintage Hamm's coasters at a local antique shop that I put by everyone's place for their tasting glass. 

A growler with some flowers from the landscaping made the perfect centerpiece.

I listed all of the beer and food on a document in Powerpoint and printed a couple of copies for the table. In addition to MN beers, we had cheeses from Minnesota, a sampling of sausages, and a variety of mini bundt cakes.

 
The line-up of all the beers we tasted.

Cheers! Time to start working on next year's tasting theme.

Blogger Template created by Photographic Elements