Pages

Showing posts with label Birthdays. Show all posts

'Go Hog Wild' Pig Birthday Card

Sunday, February 7, 2016

There are many things I love about craft club: seeing the girls each month, hearing what's new with everyone, Kathee's homemade dinners, DESSERT, working on my to-do list, seeing what everyone creates, the list goes on and on.   In addition to lending each other stamps and tools, we also bring supplies we no longer use to set out for grabs, which is how I came to acquire a stack of cut-out pigs!

I came up with this card to use-up the pink paper pigs that says, "It's your birthday....GO HOG WILD!"

Here's the inside:

'Beer & Meat' 30th Birthday Picnic Pig Roast

Sunday, August 24, 2014

For my husband's 30th birthday we hosted a 'Beer and Meat' themed pig roast party to celebrate! The guys roasted a pig in he backyard which was the star of the show, but here are some of the details I included:

Centerpieces: Fresh cut flowers in mason jars with a red & white check ribbon
Serve ware: Divided plates worked well for baked bean and mac & cheese sides, glass jars held silverware, pig napkin holder & red napkins. 
Favors: Custom coozies I designed and ordered using the Pabst Blue Ribbon logo and changing it to say 'Chris' 30th Birthday'.  I placed them in a galvanized tub lined with a red cloth napkin to match the theme.
Wine: I went for labels when choosing wine as an alternative to the beer we were offering. The 'Pig' labeled wine included  La Granja Tempranillo from Trader Joe's ($3.99) and a Foodies Merlot from World Market ($7.99).  We had whites too, but sadly none with pig labels.
Dessert: A help-yourself Root Beer Float station. Before the party I scooped ice cream into red solo cups and placed in our deep freezer in the garage. guests could grab a cup and fill with root beer and a red and white paper straw. I framed a sign telling guests to help themselves.  I also set out tootise pops in a jar with a sign that said '30 Sucks' for the kids.
Seating: I love using high-top tables at parties so guest can easily eat without all the mess of tables and chairs.  I rented three for about $10 a piece.  Top with a 120" round tablecloth and tie off around the base for a professional look.  I also bought these fun picnic tables from Crate and Barrel and set them on red and white striped picnic blankets for additional seating.
Invites: To save on printing I designed the invite in black and white and printed on brown card stock for a rustic look. I found fitting images that I liked on Google images. A piece of red and white bakers twine adds some color and fit the theme.


Wooden Birthday Calendar

Sunday, July 20, 2014

After seeing a lot of ideas for wooden birthday calendars on Pinterest, I thought it would be a fun gift for my husband's grandparents.  I don't think it's the perfect gift for everyone since it has to hang on the wall, but his grandparents are always so proud of how their family has expanded so I thought they'd love to display it.
I purchased these wooden disks from Michaels' for the birthdays.  They had the wooden hearts in 1 1/2" as well, so I bought those for the anniversaries.

I made this template on a block of wood so the holes would be directly across from each other and the birthdays would hang strait.  It was really helpful since I tried a few without it!

 I drilled the holes as close to the edge as I could without them cracking. Some did crack, so I would plan on buying extra.

After the holes were drilled I painted the wood chips with acrylic paint (and a glass of wine).  I chose to assign a different color to each of their kids, then use a lighter shade of that color for those grandkids, and an even lighter shade for the great-grandkids from that family.

 Writing on the circles and hearts was the easiest, since we would have needed really small stickers (I had to have my mom do it since my handwriting is horrible!) We wrote the name and date of the month on the front side, and the full date with year on the back.  'S' hooks from the hardware store connected the circles and hearts.

We screwed 12 eyelet hooks to the base of the board, one for each month.

I used sticker letters to label each month, since these letters were too small to neatly cut on the cricut.

I used my cricut to cut out 'FAMILY' on black vinyl.  This made it easy to just peel off the back and stick the letters onto the board.

I used a ruler as a guide to make sure the word 'Family' would be in a straight line.  When pressed against the edge of the board, the ruler I have just happened to be the perfect spacing for my letters!

I love how the finished product turned out, nice and colorful!


Mail a Birthday Ball

Sunday, May 25, 2014

My nephew just turned two, so we sent him a ball through the mail to celebrate--a cheap and easy way to send some fun! The ball was $2.99 at Target.  I used a permanent marker to write his address on one side and a short message on the other.  Take it to he post office and it's good to go--no packaging needed! 

Spa Birthday Gift

Sunday, March 16, 2014

For my 28th birthday, my brother and sister-in-law sent  me '28 things to use for a spa day'.  It was such a neat idea that I had to post it!

I came home from work travel two days before my birthday to a giant box filled with goodies---what a fun surprise! All 28 items were individually wrapped in fun tissue paper, so I got to unwrap each one separately, extending the fun.  

Here's a photo of everything I got! Wine and chocolates, candles, fun zebra print towels and washcloths that match both of my bathrooms, and of course every bath and body item you could imagine!

Birthday Cupcake Kit

Sunday, February 23, 2014

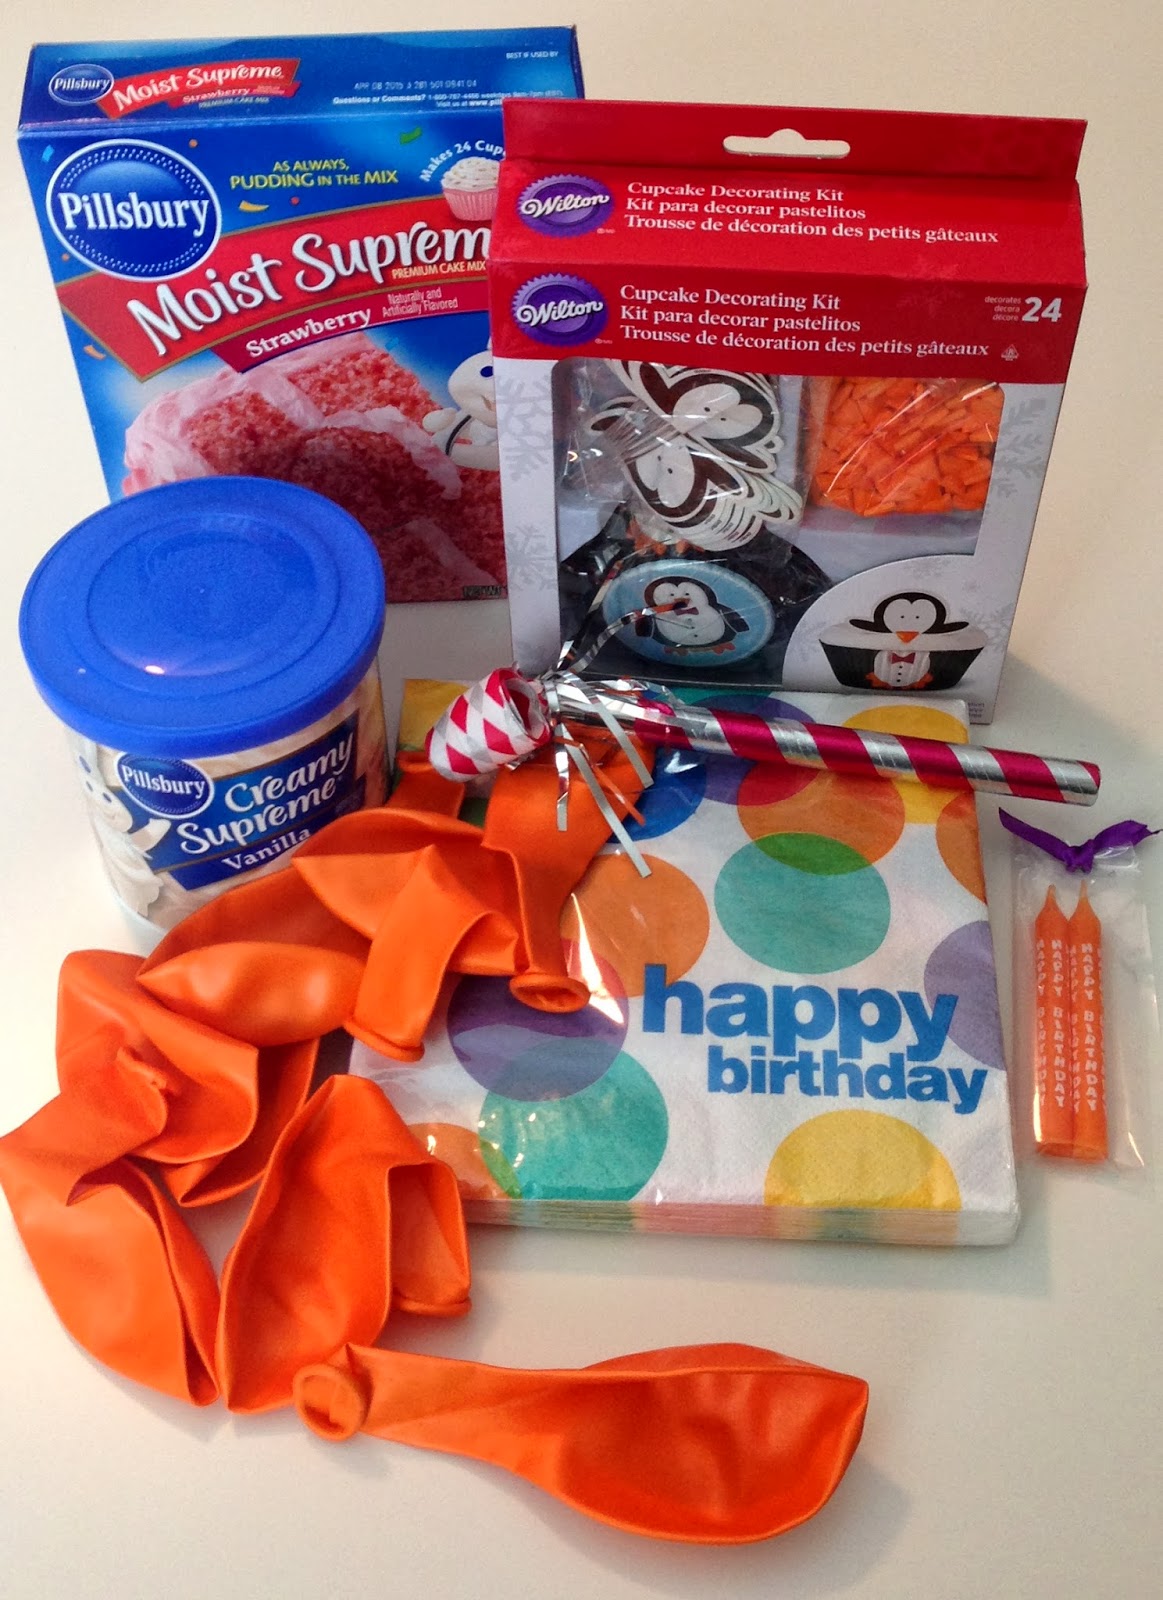
Our sister in-law loves penguins, so when I saw this penguin cupcake kit I had to get it for her upcoming birthday. 
She doesn't live near us so I couldn't just make the cupcakes for her, so instead I put together everything she needed for a fun little bithday party!


Here's what I included:
-The Penguin decorating kit, which included cupcake liners and toppers
-Her Favorite cake mix and frosting
-Birthday Napkins
-Candles in coordinating colors
-Balloons


Balloon Gift Wrap

Sunday, January 5, 2014

I have quite a few balloons left over from the Birthday Wreath I made a while back, so I thought it would be fun to use them to embellish a birthday gift! I just tied them to some ribbon to add some color and texture to the wrap.

Half Birthday Party

Sunday, November 11, 2012


My Mother-in-Law turns 50 this year, and rather than throwing her an expected 50th Birthday Party we decided to really surprise her with a 49 1/2 Birthday Party on a Thursday night, exactly 6 months before her 50th Birthday!
I wanted the party to be fun, colorful, and very 'birthday-ish', almost like a kid's party since it wasn't a 50th Birthday Party!  
We served a taco bar since it was fun, easy, and everyone loves Tacos!
The invitations--Lots of mixed colors and patterns. I tore the edged to make the paper look like it was ripped in 'half'.
 Thanks for 'Half'ing a good time candy favors, since a lot of kids attended.

Birthday straws for the Margaritas made out of ripped paper scraps to match the 'Half' theme.

 Plenty of Mexican Beers......
 .....and of course Margaritas!
 Half Chocolate, Half Funfetti Cupcakes
Half decorated with '4', Half with '9'
Half purple, Half teal (do you get the theme here?)
'Trix' crispy bars to match the bright color theme

Birthday Banner so she would know what the party was for when she walked in

Taco Bar


30th Birthday Love

Sunday, November 4, 2012


My sister-in-law recently turned 30.  Here are some of the '30th' themed gifts I put together for her:
'Thirty Blows' Gum
"Thirty Sucks' Suckers


'You're Flippin' Thirty' Flip Flops


Birthday Balloon Wreath

Sunday, October 28, 2012


I made this balloon wreath at Craft Club to hang on the door for Birthdays--like this:
It was pretty east to make and looks really neat.  There are may tutorials on-line and on pinterest, but here's my advice:
1.) Start with a foam wreath like the one above from Joann's. It's east to put pins in. Don't mess with a straw/wicker wreath.
2.) Use straight pins to pin the balloons to the wreath--just stick the pin right though it. Some people use 'U' shaped pins to pin the balloons down, but they are just too expensive!
3.) If you're going to push in 200+ pins with the same index finger, spend $3 on a thimble. Not the old school one that looks like a barbie drinking cup that's useless, but a gel-lined,  adjustable one that only covers the bottom half of your finger that pushes the pins in.
4.) I used 210 balloons, 30 of each of the 7 colors:
Pink
Orange
Yellow
Green
Teal
Blue
Purple
5.) I got all of the balloons at Target (Two-15ct. packs of each color) except for Teal and Orange. I had to go to the party store for those colors to round out the assortment.
6.) This might be common sense, but I'll say it. Don't put balloons on the back side.  They won't get seen, it won't lay flat, and you'll spend more $ on the project if you do.


Blogger Template created by Photographic Elements