Pages

Stocking-Up on Stocking Stuffers

Sunday, October 5, 2014

It's always fun to give and get stocking stuffers as a little 'something extra' at Christmas time, however if you're not careful they can end-up costing you more than an actual gift!  A lot of retailers send me coupons for free things that make excellent stocking stuffers.  (I'm not sure how I got on these lists, but I'm sure if you snoop around their web-sites you can easily sign-up). Start stocking-up now so you can collect enough goodies for all of your friends and family.  

Here are some great deals that I use for Stocking Stuffers:
$10 off Anything Over $10 Coupons
Find something for $10 and it's free! I get these offers from the following retailers:
 JC Penney-You can easily fiend a piece of clothing here for close to $10. Sometimes it's nice just to get a fresh white tank, something everyone loves but never buys themselves! They also have great deals on jewelry, scarves, hats, mittens, etc.
DSW-Smartwool socks, leg warmers, cute boot socks, or a piece of jewelry
Kohls-Great deals on scarves and jewelry, but you can also find a ton of great kitchen items or wine glasses for under $10. Who doesn't love new dishtowels?!?

Free Stuff
Victoria's Secret-I am always getting coupons for free undies, and the one size fits most lacie's are a great gift option since size doesn't matter!
Bath & Body Works-Free travel size lotion or body wash.  Stock-up early and you can get one of each in the same scent to create a little bundle.
Godiva-Free truffle every month (which you should just eat). However, they give you $10 off the month of your birthday, so if your birthday is close to December Godiva chocolate bars would be appreciated by anyone!

DIY Crafts
It's easy to make multiples of a single craft project to give to everyone on your list.  Some great homemade gifts include wine cork ornaments, tile coasters, wine bottle candles, or Reinbeers!

Hint: Stocking stuffers don't have to be Christmas themed, but if you must, get something basic that will be useful after the holidays and tie it up with a holiday themed ribbon!


Hosting an Informal Beer Tasting

Sunday, September 28, 2014

My husband received a variety of different craft beers as gifts at his 30th Birthday Party, so I thought it would be fun to drink one of each at a beer tasting!  Our parents were visiting for a night before attending the MN state fair, so I thought this was the perfect occasion to try all of the beers.   I usually go all out making my events themed and matchy/matchy, but this beer tasting was very informal using the beers we had on-hand and things I had around the house.  The only thing I bought special was the food, and it still turned out really fun! 

Here's what you need to throw together a fun, laid back beer tasting:

-Beer:  We sampled 14 beers between 5 of us, which was a good amount.  Everyone had a good taste of each beer, without being forced to drink too much if it wasn't their favorite. The amount of beer overall seemed right too for a weeknight social. Our beers were determined by what my hubby got as gifts, but fun themes might be Octoberfest, lagers, mexican beers, imports, nostalgic  beers (Grain Belt, Pabst Blue Ribbon, Hamms), etc.

-Beer List: I visited the websites of all the beers we tasted and copied their pictures and descriptions into a word document.  I sorted them in the order we were tasting them and printed for each of our guests.

-Fun Bar Food: We has a variety of snacks both store bought and homemade including cheese straws, smoked salmon, candied bacon, buffalo chicken pinwheels, and sausage/cheese/pretzel bun skewers.  The food was fun and fancy but still easy to execute and went well with beer.  I tried to plan the menu so we could try some new foods along with the new beers.

-Great Atmosphere: We hosted our beer tasting on our deck, complete with patio lights, wood table, and  colorful outdoor pillows. The temperature was perfect and croaking frogs took the place of a playlist. The space was comfortable and festive for drinking beer,eating snacks, and talking for a couple of hours.

-Real Dishes & Glasses: Rarely do I use paper cups/plates when entertaining, as it looks and feels much better to use real, plus I think it's easier to load the dishwasher than take out the trash.  Small white square plates are perfect for appetizers at any party, or for everyday use. We poured beer in our juice glassed which were the perfect size for a beer tasting.  

-Fun Napkins: Since I didn't go all-out with a theme, I at least wanted the cocktail napkins to be fun.  I buy fun napkins whenever I see them and pull them out for various occasions.  These 'DRINK' napkins were perfect for our beer tasting. A mariposa napkin holder is a must-have for easy entertaining.

-Insulated Beverage Tub: We used this to keep all of the beers cold and within reach on our deck.  I have two and use them both pretty much whenever we have company.  Be sure to get one thats insulated to avoid water drips from condensation. It will also allow you to set out drinks and ice before guests arrive, making entertaining easier.


Blue Cheese Squash Hash

Wednesday, September 24, 2014

This squash hash is my favorite fall dish.  The recipe can be found here and is from my favorite restaurant, 112 Eatery (if you haven't been, it's  'I eat there on my birthday every year' good). I think I make this dish even better by adding bacon, that usually makes anything better.  The blue cheese makes it great with a glass of red wine.  I made it once already this year with squash in my CSA, and will definitely be making it again!

Thrifting Haul

Sunday, September 21, 2014


I love it when my friend Halle from craft club posts pictures of her goodwill and garage sale finds, so I thought I'd do the same! Here's what I picked-up while running errands yesterday.

$3-A small glass jar to hold matches next to a candle on my coffee table tray.  I was so excited I filled it with matches as soon as I got home.  I plan to etch the bottom of the bottle for striking the matches, but if I don't get to it I might just cut the striking tip form the matchbox and tape it to the bottom. I found it at Hunt and Gather in Minneapolis.

$3-A snowmobile trophy top.  This thing is solid metal.  Since there's a screw on the bottom where it attached to a trophy, I though it might be cool to attach to a cork and use as a bottle stopper for one of my husband's scotch bottles. We'll see if it works. Also from Hunt and Gather.

$15-Solid wood antique dresser.  I've been looking for a piece with a lot of character for our entryway for years, and at this garage sale the price was right (I think I could have gotten it for $10 but I have a personal rule not to negotiate on anything I've been searching more than a year for!) It's dark cherry, not black as the photo conveys.  The hardware is original so I figured that was at least worth $15.  Not sure if I'll paint it, strip and stain, or chop up for firewood (it kind of smells musky, and the drawers stick, and my husband hasn't seen it yet, so its fate is unknown.......)

$1-Boomerang. How can you see a boomerang at a garage sale and not buy it?!?! They guy selling assured me it worked. I'll have to wait to test it out at my parent's farm. I'm upset with myself because they also had a bucket of metal baseball bats with a handwritten sign that said, "Protect your house!" that I thought was really funny. I planned on snapping a photo of it until the boomerang distracted me.


Retirement Wine Cork Ornaments

Sunday, September 7, 2014

This year both my mom and my friend Kathee from Craft Club retired.  For something special, I made them both cork ornaments  using corks from the wine served at their retirement parties.   

Above are ornaments I made for Kathee symbolizing things that she would do in retirement, and below is a Christmas tree I made with the remaining corks. 
With some eyelet screws, beads, ribbon, and glue the possibilities of cork ornaments you could make is endless. This is an easy way to make a little reminder of any special occasion, just remember to save the cork!


Anniversary Picnic Favors

Sunday, August 31, 2014

My husband's grandparent's recently celebrated their 60th anniversary party with a picnic at their farm.  For the favors, I printed the expression, "With you, everyday is a picnic" along with a picnic basket and two ants onto a white treat bag.  Each bag was filled with a few pieces of nostalgic candy and sealed it with a piece of check fabric washi tape from Michael's.

'Beer & Meat' 30th Birthday Picnic Pig Roast

Sunday, August 24, 2014

For my husband's 30th birthday we hosted a 'Beer and Meat' themed pig roast party to celebrate! The guys roasted a pig in he backyard which was the star of the show, but here are some of the details I included:

Centerpieces: Fresh cut flowers in mason jars with a red & white check ribbon
Serve ware: Divided plates worked well for baked bean and mac & cheese sides, glass jars held silverware, pig napkin holder & red napkins. 
Favors: Custom coozies I designed and ordered using the Pabst Blue Ribbon logo and changing it to say 'Chris' 30th Birthday'.  I placed them in a galvanized tub lined with a red cloth napkin to match the theme.
Wine: I went for labels when choosing wine as an alternative to the beer we were offering. The 'Pig' labeled wine included  La Granja Tempranillo from Trader Joe's ($3.99) and a Foodies Merlot from World Market ($7.99).  We had whites too, but sadly none with pig labels.
Dessert: A help-yourself Root Beer Float station. Before the party I scooped ice cream into red solo cups and placed in our deep freezer in the garage. guests could grab a cup and fill with root beer and a red and white paper straw. I framed a sign telling guests to help themselves.  I also set out tootise pops in a jar with a sign that said '30 Sucks' for the kids.
Seating: I love using high-top tables at parties so guest can easily eat without all the mess of tables and chairs.  I rented three for about $10 a piece.  Top with a 120" round tablecloth and tie off around the base for a professional look.  I also bought these fun picnic tables from Crate and Barrel and set them on red and white striped picnic blankets for additional seating.
Invites: To save on printing I designed the invite in black and white and printed on brown card stock for a rustic look. I found fitting images that I liked on Google images. A piece of red and white bakers twine adds some color and fit the theme.


Wooden Birthday Calendar

Sunday, July 20, 2014

After seeing a lot of ideas for wooden birthday calendars on Pinterest, I thought it would be a fun gift for my husband's grandparents.  I don't think it's the perfect gift for everyone since it has to hang on the wall, but his grandparents are always so proud of how their family has expanded so I thought they'd love to display it.
I purchased these wooden disks from Michaels' for the birthdays.  They had the wooden hearts in 1 1/2" as well, so I bought those for the anniversaries.

I made this template on a block of wood so the holes would be directly across from each other and the birthdays would hang strait.  It was really helpful since I tried a few without it!

 I drilled the holes as close to the edge as I could without them cracking. Some did crack, so I would plan on buying extra.

After the holes were drilled I painted the wood chips with acrylic paint (and a glass of wine).  I chose to assign a different color to each of their kids, then use a lighter shade of that color for those grandkids, and an even lighter shade for the great-grandkids from that family.

 Writing on the circles and hearts was the easiest, since we would have needed really small stickers (I had to have my mom do it since my handwriting is horrible!) We wrote the name and date of the month on the front side, and the full date with year on the back.  'S' hooks from the hardware store connected the circles and hearts.

We screwed 12 eyelet hooks to the base of the board, one for each month.

I used sticker letters to label each month, since these letters were too small to neatly cut on the cricut.

I used my cricut to cut out 'FAMILY' on black vinyl.  This made it easy to just peel off the back and stick the letters onto the board.

I used a ruler as a guide to make sure the word 'Family' would be in a straight line.  When pressed against the edge of the board, the ruler I have just happened to be the perfect spacing for my letters!

I love how the finished product turned out, nice and colorful!


Shark/Ocean Cupcakes

Sunday, June 8, 2014

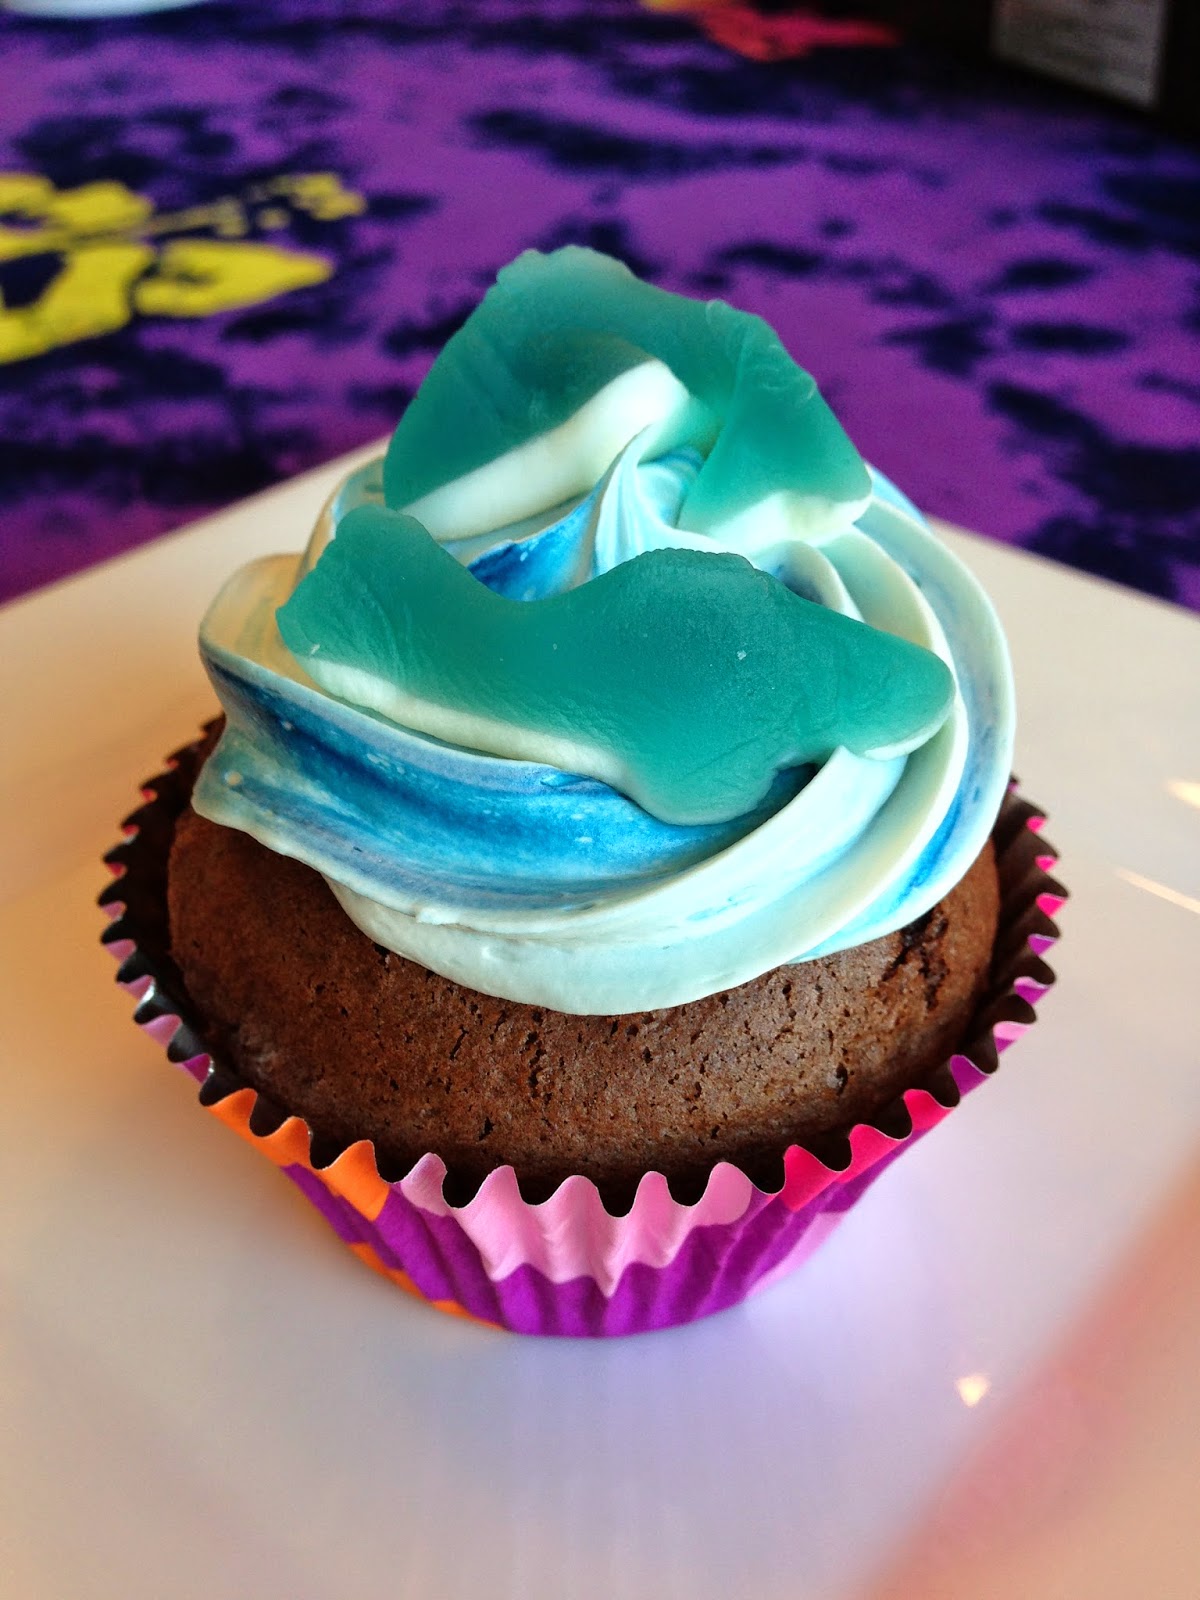
I made these circling shark cupcakes for our luau.  They turned out pretty cool and all it took was some blue food coloring!

Start by whipping a can of white frosting using my mixer.  Whipping the frosting makes it more fluffy so its easier to pipe.

Drop a few drops of blue food coloring on the frosting after its been whipped.

Gently fold in the blue coloring, being careful not to mix too much.

Cut the corner of ziploc bag and insert the piping tip.  Scoop the frosting into the bag, adding more drops of blue if you'd like.

As the frosting is piped onto the cupcake, the white and blue mix further creating the ocean colors.

Top with two gummy sharks, or any other sea creature candy!


DIY Hawaiian Grass Skirt

Sunday, June 1, 2014

This grass skirt is easy and inexpensive to make.  It can be used  as a costume or to decorate for a Luau. The best part is that it costs about $1 to make!

I came up for the idea when cruising through the dollar store for luau decor.  When I saw the green crepe streamers, I instantly thought grass skirt!  All you need is the crepe streamers, Frogtape brand painter's tape, and fake flowers if you like.

First cut the streamer into strips of your desired length.  I chose the length of my 'Tiki bar' counter to the floor. To make the measuring easy, I positioned two of my dining room chairs to equal the length I needed, then wrapped the crepe streamers around them.  With two simple cuts all of my streamers were cut.

 Next cut a piece of Frogtape to the width you want your skirt to be. Begin placing the strips of crepe streamers halfway on the tape so it can be folded over later. 

I spaced the streamers right next to each other, but they could be spaced less of overlap.

After all of the streamers have been applied, fold the tape over so there is no stickiness left exposed, creating a nice edge to the grass skirt.

I chose to use Frogrape because it's green.  When it comes time to tape the skirt to a table or wall for decor, I'll use the same green Frogtape so it appears seamless and won't cause any damages!


Blogger Template created by Photographic Elements