Pages

Hot Coco Kit Gift Basket

Sunday, December 9, 2012


I put together this Hot Coco Kit for my Mother-in-Law last year for sledding over the holidays.  It included a Thermos with pump dispenser for the hot chocolate, red basket to carry everything to the sliding hill, and all of these treats:
Jars with hot coco mix, mini-marshmallows, and chocolate covered peppermint stir sticks

Cups with lids, Napkins, and Stir Sticks

Candy Cane Cookies for a Snack

'Naughty and Nice' mix-ins: Peppermint Schnapps and Raspberry Flavored Syrup

Reinbeers

Sunday, December 2, 2012


 Last year for Christmas I made Reinbeers, along with a lot of people since they were so popular.  I just love them!  Crafts and beers--my favorites!
All you need is brown pipe cleaners, wiggly eyes, red pom-poms, and a hot glue gun!

Simple Kitchen Menu Board

Sunday, November 18, 2012

 I find it's great to list what I plan on making each night so Chris can start making dinner if he gets home before me.  Sometimes I just list out all the things I could possibly make with the staple food I know we have, and we pick out meals from the list.
I wanted a chalk-board for my kitchen to plan meals on.  My kitchen is grey with white cabinets and black countertops and hardware, so I thought a chalkboard would look great on the grey walls....
....and cluttered in the limited wall space....and dirty when the chalk dust got everywhere. 
Since I had become anti-chalkboard I was excited to find this decorative dry-erase board at Staples.  It has a sticker back so it can go anywhere without sticking out, making it perfect for this empty spot on the side of my fridge, convenient but un-noticed and out of the way:

 I added a magnetic stainless steel cup below to hold pens and they dry erase marker, as well as a paper notepad for grocery lists, since I need to be able to take lists with me.

Half Birthday Party

Sunday, November 11, 2012


My Mother-in-Law turns 50 this year, and rather than throwing her an expected 50th Birthday Party we decided to really surprise her with a 49 1/2 Birthday Party on a Thursday night, exactly 6 months before her 50th Birthday!
I wanted the party to be fun, colorful, and very 'birthday-ish', almost like a kid's party since it wasn't a 50th Birthday Party!  
We served a taco bar since it was fun, easy, and everyone loves Tacos!
The invitations--Lots of mixed colors and patterns. I tore the edged to make the paper look like it was ripped in 'half'.
 Thanks for 'Half'ing a good time candy favors, since a lot of kids attended.

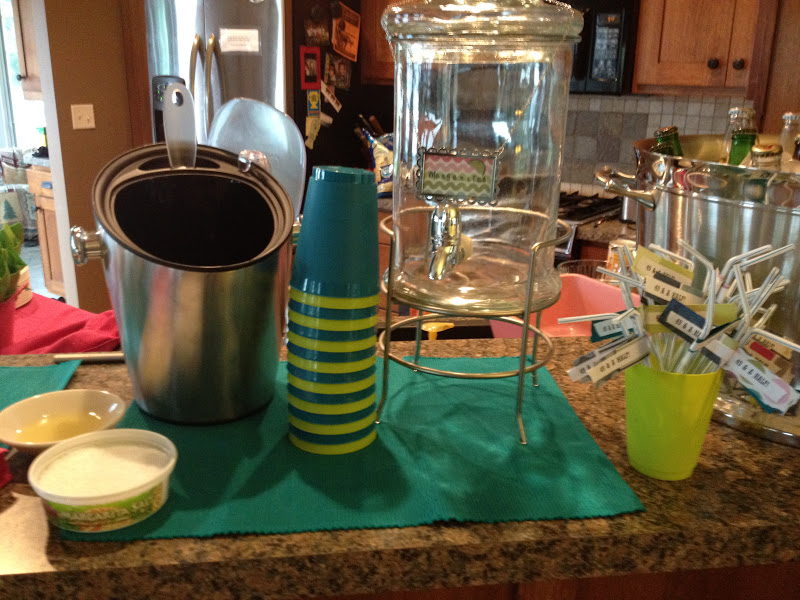
Birthday straws for the Margaritas made out of ripped paper scraps to match the 'Half' theme.

 Plenty of Mexican Beers......
 .....and of course Margaritas!
 Half Chocolate, Half Funfetti Cupcakes
Half decorated with '4', Half with '9'
Half purple, Half teal (do you get the theme here?)
'Trix' crispy bars to match the bright color theme

Birthday Banner so she would know what the party was for when she walked in

Taco Bar


30th Birthday Love

Sunday, November 4, 2012


My sister-in-law recently turned 30.  Here are some of the '30th' themed gifts I put together for her:
'Thirty Blows' Gum
"Thirty Sucks' Suckers


'You're Flippin' Thirty' Flip Flops


Spooky Treat Sampler

Wednesday, October 31, 2012


Here’s a photo of the ‘Spooky Treat Sampler’ I brought to the work potluck, featuring some great Pinterest finds!
-Witch Finger Pretzel rods
-Oreo Ball Monsters
-Ghost Nutter Butters
-Witch hat Cookies
-Candy Corn, pretzel, peanut bark
- Mummy Pretzles
-Candy Corn/Hug Pretzels
 
Happy Halloween!

Birthday Balloon Wreath

Sunday, October 28, 2012


I made this balloon wreath at Craft Club to hang on the door for Birthdays--like this:
It was pretty east to make and looks really neat.  There are may tutorials on-line and on pinterest, but here's my advice:
1.) Start with a foam wreath like the one above from Joann's. It's east to put pins in. Don't mess with a straw/wicker wreath.
2.) Use straight pins to pin the balloons to the wreath--just stick the pin right though it. Some people use 'U' shaped pins to pin the balloons down, but they are just too expensive!
3.) If you're going to push in 200+ pins with the same index finger, spend $3 on a thimble. Not the old school one that looks like a barbie drinking cup that's useless, but a gel-lined,  adjustable one that only covers the bottom half of your finger that pushes the pins in.
4.) I used 210 balloons, 30 of each of the 7 colors:
Pink
Orange
Yellow
Green
Teal
Blue
Purple
5.) I got all of the balloons at Target (Two-15ct. packs of each color) except for Teal and Orange. I had to go to the party store for those colors to round out the assortment.
6.) This might be common sense, but I'll say it. Don't put balloons on the back side.  They won't get seen, it won't lay flat, and you'll spend more $ on the project if you do.


Outdoor Fall Floral Arrangements

Sunday, October 21, 2012

These are our outdoor pots on the front step for Fall/Thanksgiving, until the Christmas trees come out!
They're not my best craft ever, but I thought I'd post since there wasn't much inspiration on-line when I was looking!

I started with the pots I had the summer plants in (and even left the brown dead grass of one summer plant, bad I know, but it was a good filler!)
I added light-up tree branches that I already had, and bought some fall floral from Michaels. I'm a big fan of buying fake floral so you don't have to buy it each year :-).  I purchased fake wheat for height, grass with gold tips for color and greenery, cattail-type weeds for texture, and dark purple fuzzy ball things for color, texture, and interest. I also placed a medium pumpkin, mini pumpkin, and green/yellow squash in each bucket to help fill them up.

Beer Bar Artwork

Sunday, October 14, 2012


Our new artwork for our 'bar area wan't something that we were looking for, but it just happened to come to us, literally, in this holiday Crate and Barrel mailing!

 
Paging through Crate & Barrel catalogs and seeing how they decorate and entertain is my most favorite thing ever.  I try to save them to look through with a glass of wine, but I usually end up looking at them in the garage standing up against the trunk of my car after getting the mail--can't even wait to get in the house! 

Among the pages of great product that I can't help but want, the holiday catalog had a whole page featuring this diagram of 'The Very Many Varieties of Beer', which even lists brands of each type of beer, from microbrews to Keystone light.

 
I though it would make cool artwork for our small bar area in the basement family room.  I ripped it out, trimmed the edges, put it on some gold paper and a black mat, put it in a frame I had in the closet, and here it is! The perfect bar area artwork!


DIY Address Pillow

Saturday, September 15, 2012


I couldn't find a third pillow for our sectional so I made this pillow that incorporates our address!
I used a variety of stencils to get the lettering on the fabric.  I just used a pen to outline them since they would get filled in with paint later.
Tape helped me keep the words straight.
After all of the letters were traced, I filled them in with brown fabric paint.

After sewing into a pillow case, here is the finished product!

Scrabble Wall Art

Sunday, March 4, 2012

At a gift shop near my house, I saw a similar Scrabble wall art that used all of the names of the local towns and lakes.  It was cool, but it was $200!  
I had an old scrabble game at home that I used for mine. I had to buy another game at goodwill to get more of the letters that I needed, but that only cost $1.99.
The letters are just glued to the board, which is inside a shadowbox I bought at Michaels. 
I used "family game room" words to create mine.

To make things easier, I created a crossword puzzle on-line to determine the word layout.  I typed in the number of squares and the words I wanted to use, and it created the crossword for me. So much easier than trying to figure it out on my own!  I used this site, but I'm sure any puzzle maker site would work.

DIY Photo Booth

Sunday, February 26, 2012

For our Valentine's Day Party we created a photo booth in my craft room so guests could take their photos throughout the night!

We took photos using the Photo Booth program on my Mac, which is this Icon:

It's so easy, all you do is click on the camera and it counts down, 3..2...1... and starts taking pictures!

It takes 4 pictures and they end up in one photo like this:

To create the background, I used rolls of pink paper which we just taped to the wall. I added some Valentine's decorations to give it a 'Prom backdrop' feel:

We set out props for people to use in their pictures, including pink boas, 'LOVE' letters to hold, angel/cupid wings, valentines antennas, and a fun hat.

Here we are! It was a lot of fun and basically free to make, we just had to pay to have them made into 4x6 prints at Target!
Blogger Template created by Photographic Elements