Pages

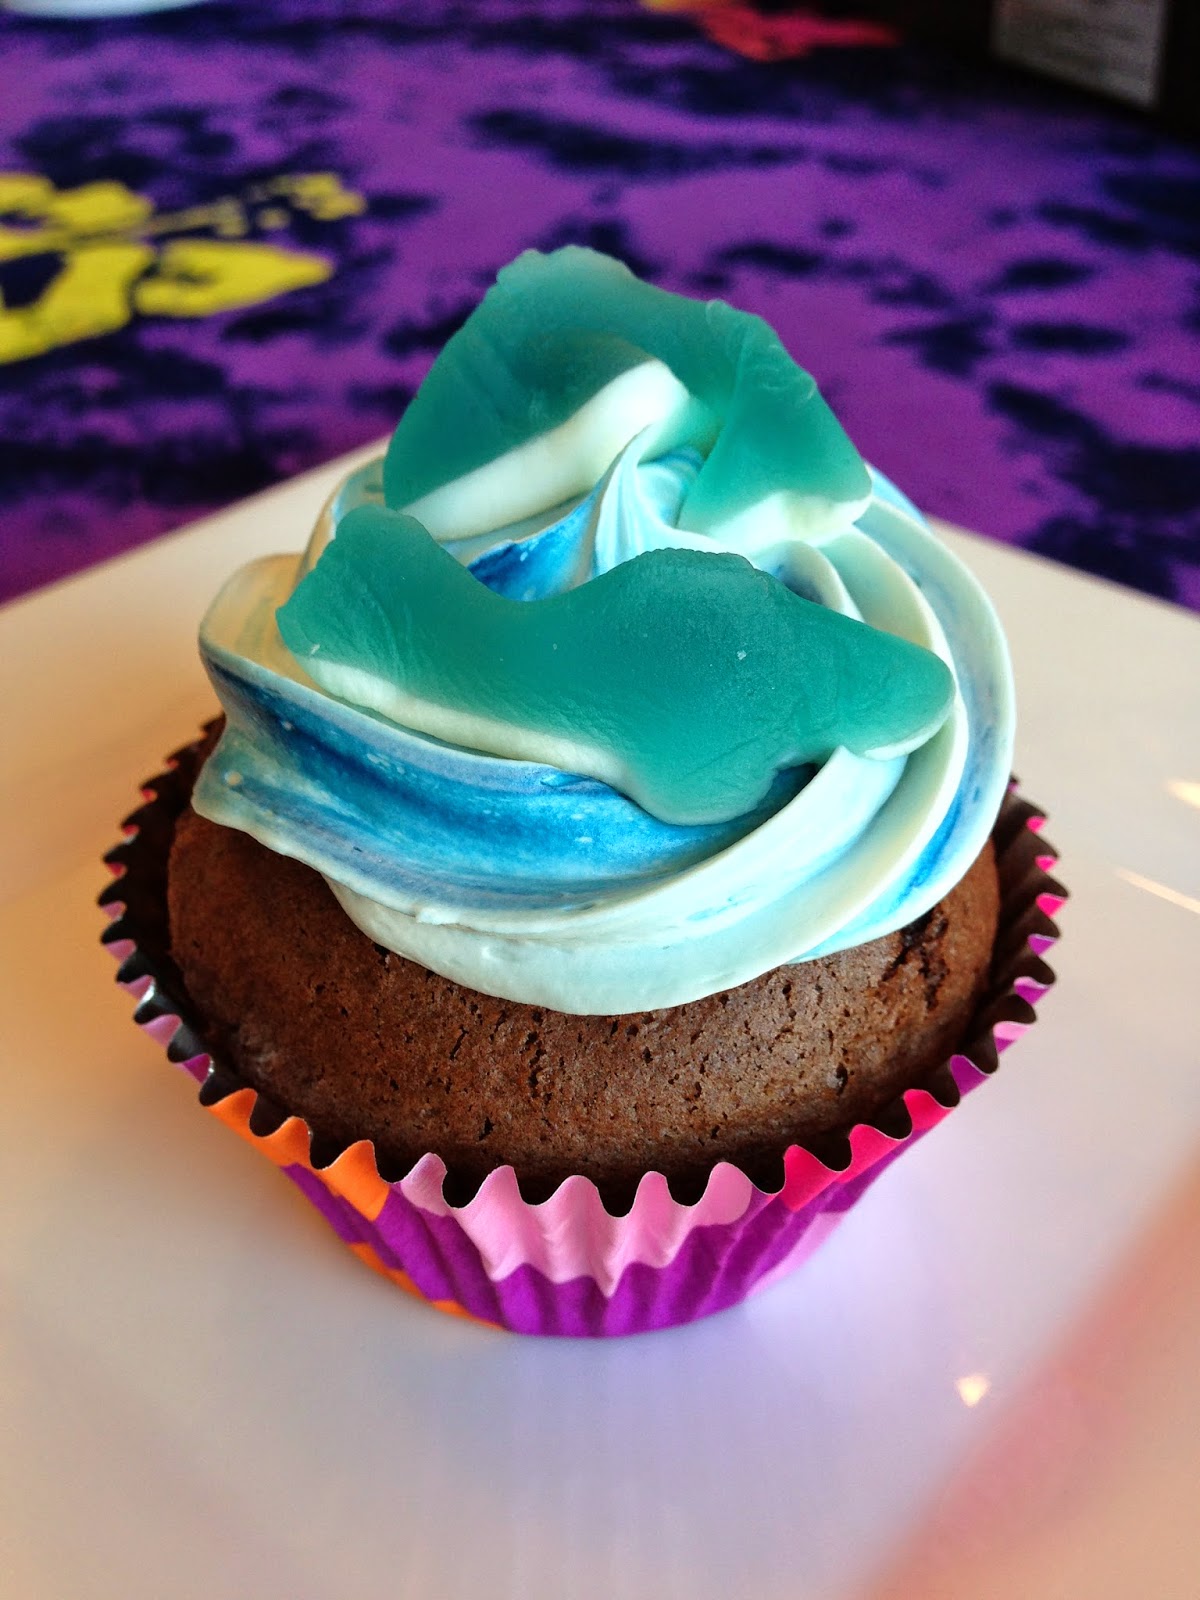
Shark/Ocean Cupcakes

Sunday, June 8, 2014

I made these circling shark cupcakes for our luau.  They turned out pretty cool and all it took was some blue food coloring!

Start by whipping a can of white frosting using my mixer.  Whipping the frosting makes it more fluffy so its easier to pipe.

Drop a few drops of blue food coloring on the frosting after its been whipped.

Gently fold in the blue coloring, being careful not to mix too much.

Cut the corner of ziploc bag and insert the piping tip.  Scoop the frosting into the bag, adding more drops of blue if you'd like.

As the frosting is piped onto the cupcake, the white and blue mix further creating the ocean colors.

Top with two gummy sharks, or any other sea creature candy!


DIY Hawaiian Grass Skirt

Sunday, June 1, 2014

This grass skirt is easy and inexpensive to make.  It can be used  as a costume or to decorate for a Luau. The best part is that it costs about $1 to make!

I came up for the idea when cruising through the dollar store for luau decor.  When I saw the green crepe streamers, I instantly thought grass skirt!  All you need is the crepe streamers, Frogtape brand painter's tape, and fake flowers if you like.

First cut the streamer into strips of your desired length.  I chose the length of my 'Tiki bar' counter to the floor. To make the measuring easy, I positioned two of my dining room chairs to equal the length I needed, then wrapped the crepe streamers around them.  With two simple cuts all of my streamers were cut.

 Next cut a piece of Frogtape to the width you want your skirt to be. Begin placing the strips of crepe streamers halfway on the tape so it can be folded over later. 

I spaced the streamers right next to each other, but they could be spaced less of overlap.

After all of the streamers have been applied, fold the tape over so there is no stickiness left exposed, creating a nice edge to the grass skirt.

I chose to use Frogrape because it's green.  When it comes time to tape the skirt to a table or wall for decor, I'll use the same green Frogtape so it appears seamless and won't cause any damages!


Lethal Luau Murder Mystery Party

Wednesday, May 28, 2014

This past winter we hosted a Murder Mystery Luau to have some fun and bring to tropics to our long winter! Here are some of the things we included at our party:


.
These printable invitations from JC Penney 

 
Roles sent with invitations so guests could dress their parts

Our homemade tiki bar

Pink Flamingos in the plants

Tropical barware

Hawaiian Beers 

A painted Sunset, ocean, and volcano

Shark Cupcakes

Clam cookies and chocolate shells in graham cracker 'sand'

Flowers

Shells and Sand

Tropical Scents

Cored Pineapple Pina Coladas


Mail a Birthday Ball

Sunday, May 25, 2014

My nephew just turned two, so we sent him a ball through the mail to celebrate--a cheap and easy way to send some fun! The ball was $2.99 at Target.  I used a permanent marker to write his address on one side and a short message on the other.  Take it to he post office and it's good to go--no packaging needed! 

How to Paint Your Cuttlebug

Sunday, May 18, 2014

For a long time the Cuttlebug was the missing link in my craft room, not because I didn't want one, but because it was green and yellow!  I know color shouldn't matter, but everything in my craft room is white so if I got one, it would go in the closet, and if it was in the closet it wouldn't get used.  I was so excited when they came out with a white one so I could buy it!  The base was blue which I thought would match the blue/grey stripe in my craft room, but not so much.  The blue was so bright and obnoxious to me, and since my craft room doubles as my home office I had to change it!!

I decided I would paint the blue base silver to match my Cricut (even though my Cricut is ivory and my Cuttlebug is white!)  I went with this metallic silver from Martha Stewart Crafts that I found at Michael's.

Although spray paint seemed ideal, taping would have been near impossible so I painted by hand, first applying a coat of primer, then the silver paint.

Here's how it looked after one coat--I was starting to have second thoughts! It took 3 coats of paint to get the color how I wanted it.

I didn't paint the inside or the handle to make things easier, and cleaner!  There was a little bit of blue that showed through the gap when closed, so I added a piece of silver washi tape to cover that spot.


Here is the before and after.  I'm happy with how it turned out!


Mother's Day 'Senses Themed' Gift Basket

Thursday, May 15, 2014

I thought it would be fun to give our moms a few fun things to enjoy a nice day for Mother's Day, so I decided on a 'senses' theme to tie everything together.  I printed each 'sense' onto a piece of vellum to make the tags, then used bakers twine to tie them to the coordinating item.  This theme would also work for birthdays or any other occasion!

Here's what I included:
See-Movie
Taste-Gourmet Popcorn
Feel-Hand Lotion
Smell-Difusior
Listen-CD
Indulge-Chocolate Bar
Sip-Gourmet Soda
Relax-Tequilia
Love-Framed Photo

 Here it is all in a fun basket!

Easter Gift Tags

Friday, April 18, 2014

Here's a quick and easy Easter tag I threw together using some colorful scraps:
-Card stock printed with 'Happy Easter', then cut to crate tag shape
-Bunny cut using Animal Kingdom Cricut cartridge
-Chevron washi tape border
-PomPom tail

This year I decided to go with Easter 'Bags' instead of Easter Baskets since they travel better!

'Two Carat' Easter Earrings

Monday, April 14, 2014


These 'Two Carat' earrings are a fun, unique, inexpensive, and non-candy addition to any Easter basket! They are quick and easy to make as well.

Cut two carrots out of orange card stock.  I didn't use a pattern so each one was unique, just like in nature.

Score each carrot to add horizontal lines, like you would find on an actual carrot.

Create the card for the earrings by printing the words 'Two Carats' on card stock. Position and cut according to the size card you like.

Use two pieces of green ribbon to create each carrot stem.  Glue them to the card stock before adding the carrot.

After the carrot is secured to the card stock, punch a hole in the center of each carrot to push the earring through. I used the small punch I use for brads.

I found this 3-pack of 'diamond' earrings at Target for only $4.99!  It worked out great since I was making three sets.

 Place the earrings onto the card you just made and that's it! 


Blogger Template created by Photographic Elements